Star Titan Press Tool TST838 Instructions

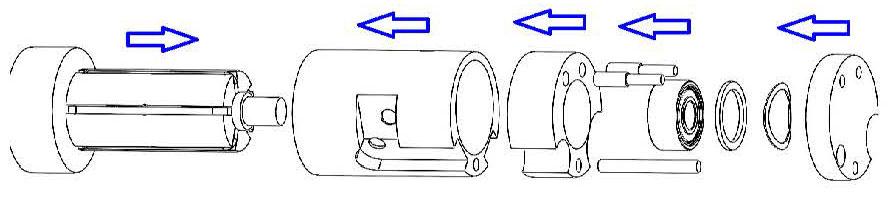
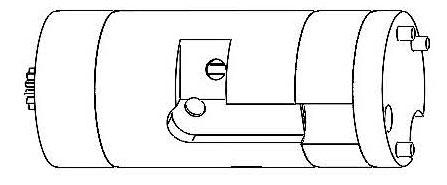
Step 1
Motor body as shown on after remove from motor shell.
Step 2
Pull to remove all the back pieces from motor body as shown

Step 3
To remove front gear
Use tool TS830 press the top of the rotor shaft

Step 4
To Remove the gear; flat washer and motor shaft

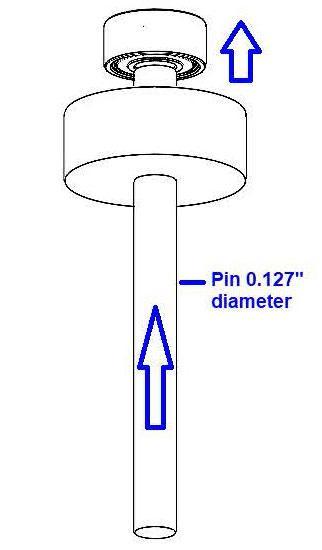
Step 5
To remove the bearing
Use pin diameter .127” press from the back end to remove the bearing
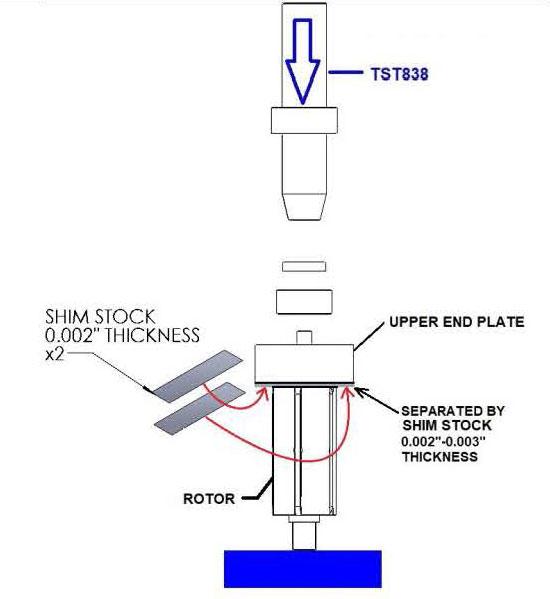
Step 6
To replace the bearing: 9A0082-000
Press the bearing and flat washer into the upper end plate using press tool part # TST838 and provided shim stock 0.002” thickness
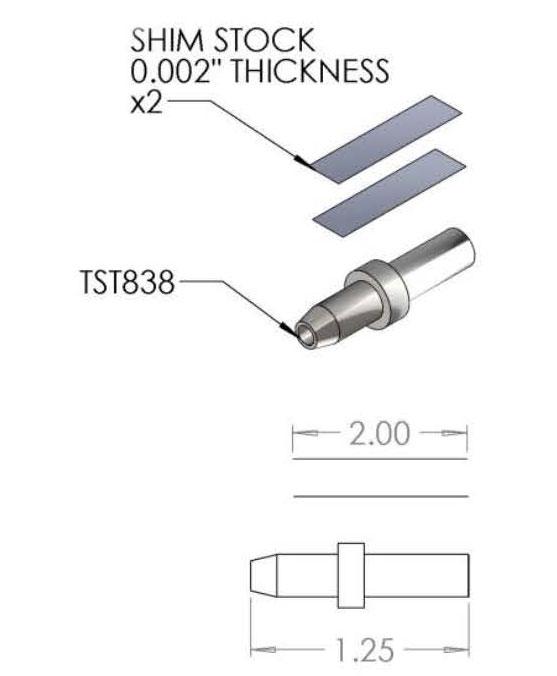
Step 7
Note: Must have a gap of 0.002” between the upper end plate and the rotor by using shim stock 0.002” provided with the TST838 tool
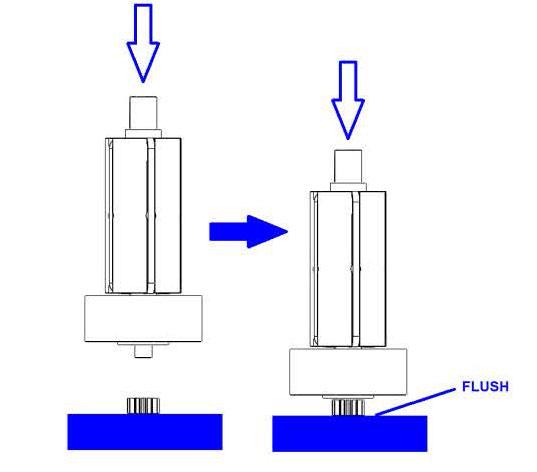
Step 8
To install the gear:
- Press the rotor shaft into the gear on a flat base block
- Make sure the gear end flushs with the end of the shaft on the flat base block
Step 9
Install all the parts together as shown on